
Flashing the SD Card
-
Download the official Raspberry Pi Imager tool here: https://www.raspberrypi.com/software/
-
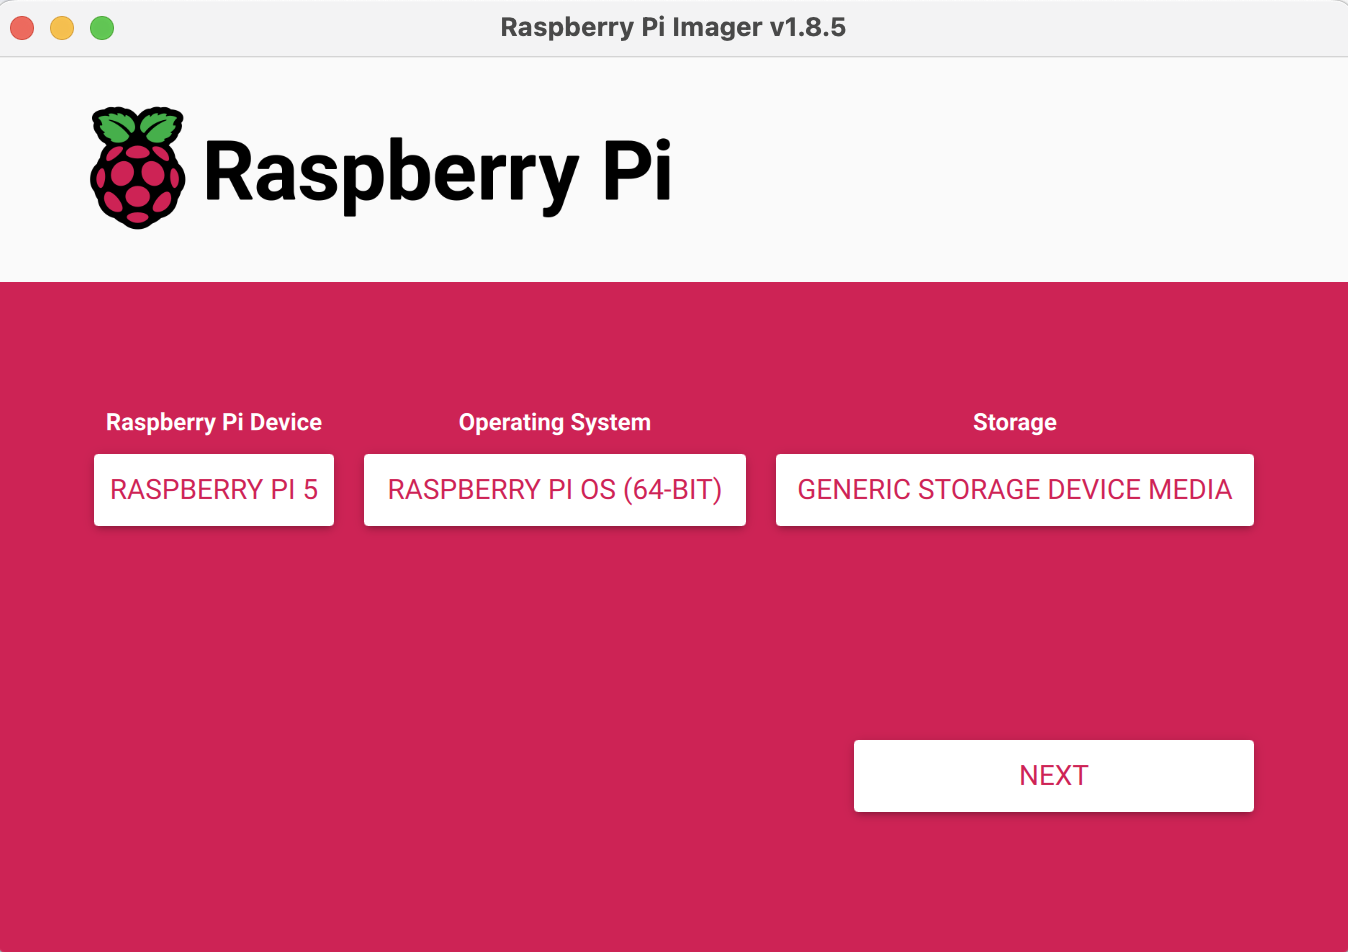
Options menu:
- Device is Raspberry Pi 5
- Operating System is Raspberry Pi OS (64-bit)
- Storage put the SD card included in the kit, into your computer, and select it
-
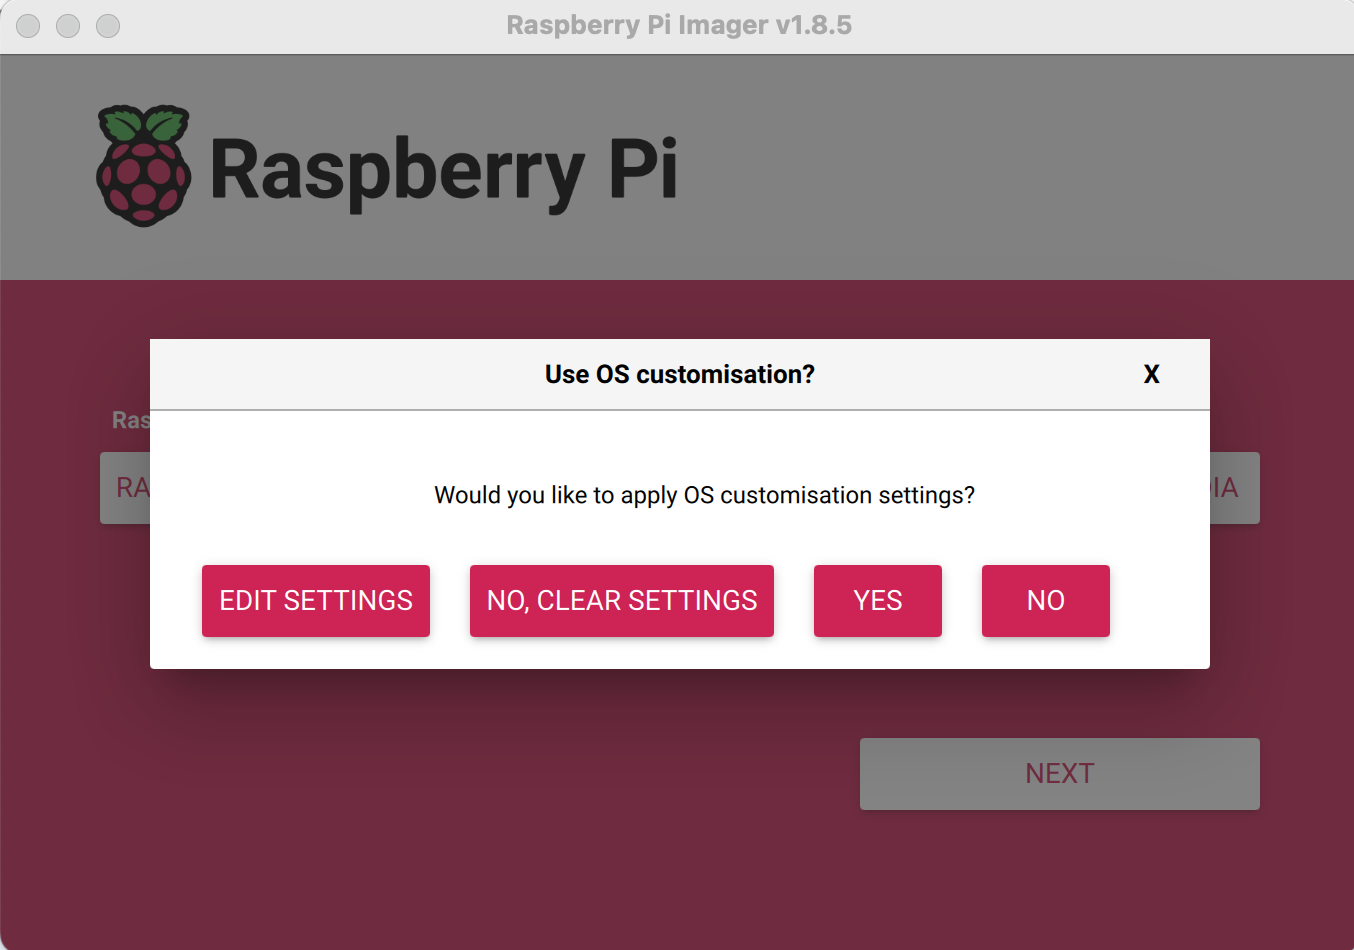
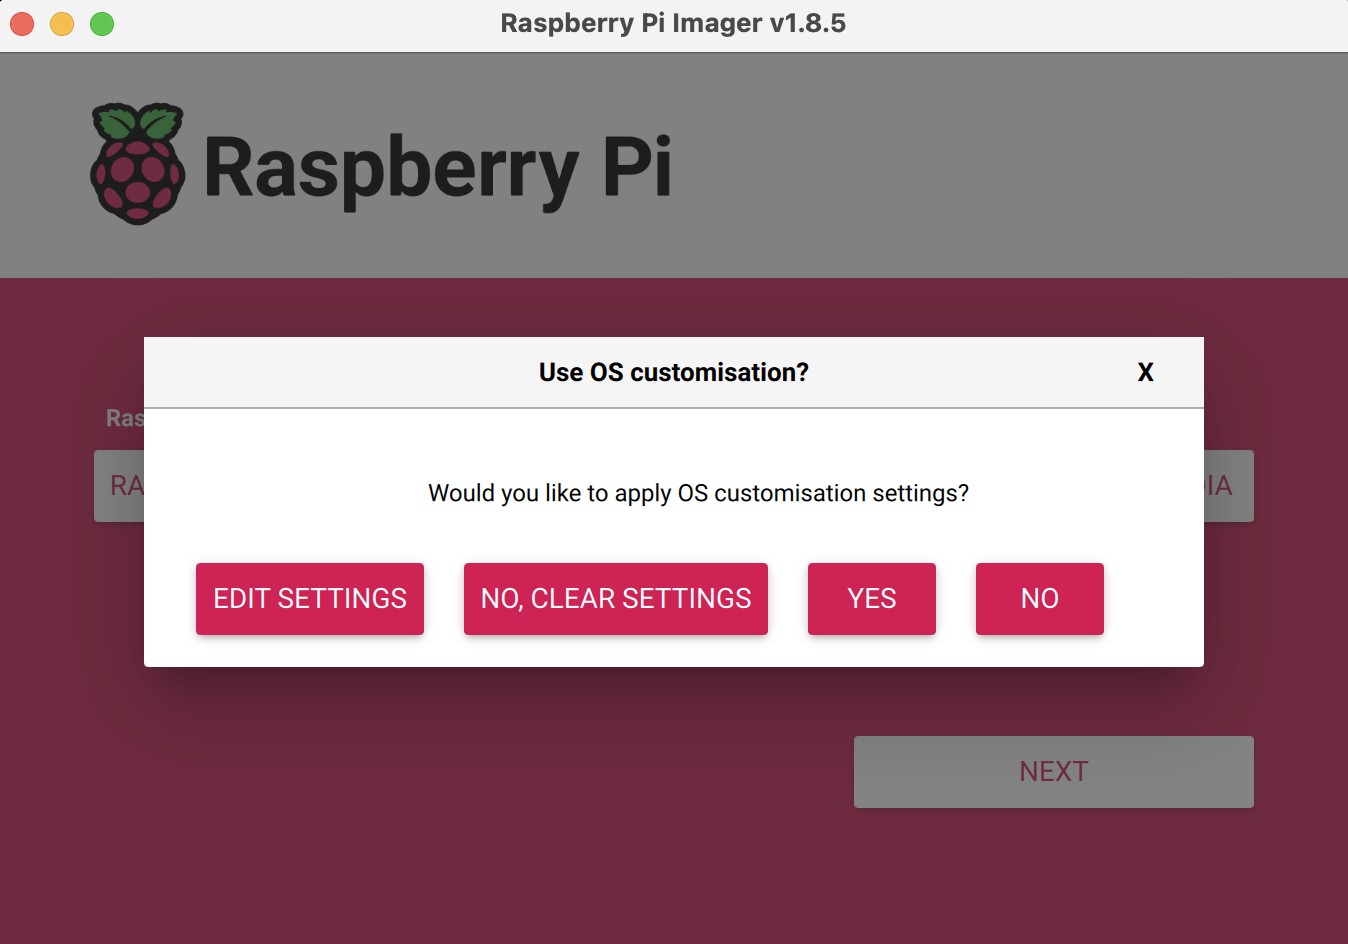
Click "Next" and a OS customization prompt should pop up. Click "EDIT SETTINGS". (You can also do ⌘ (or Ctrl) + Shift + X) from main menu.
-
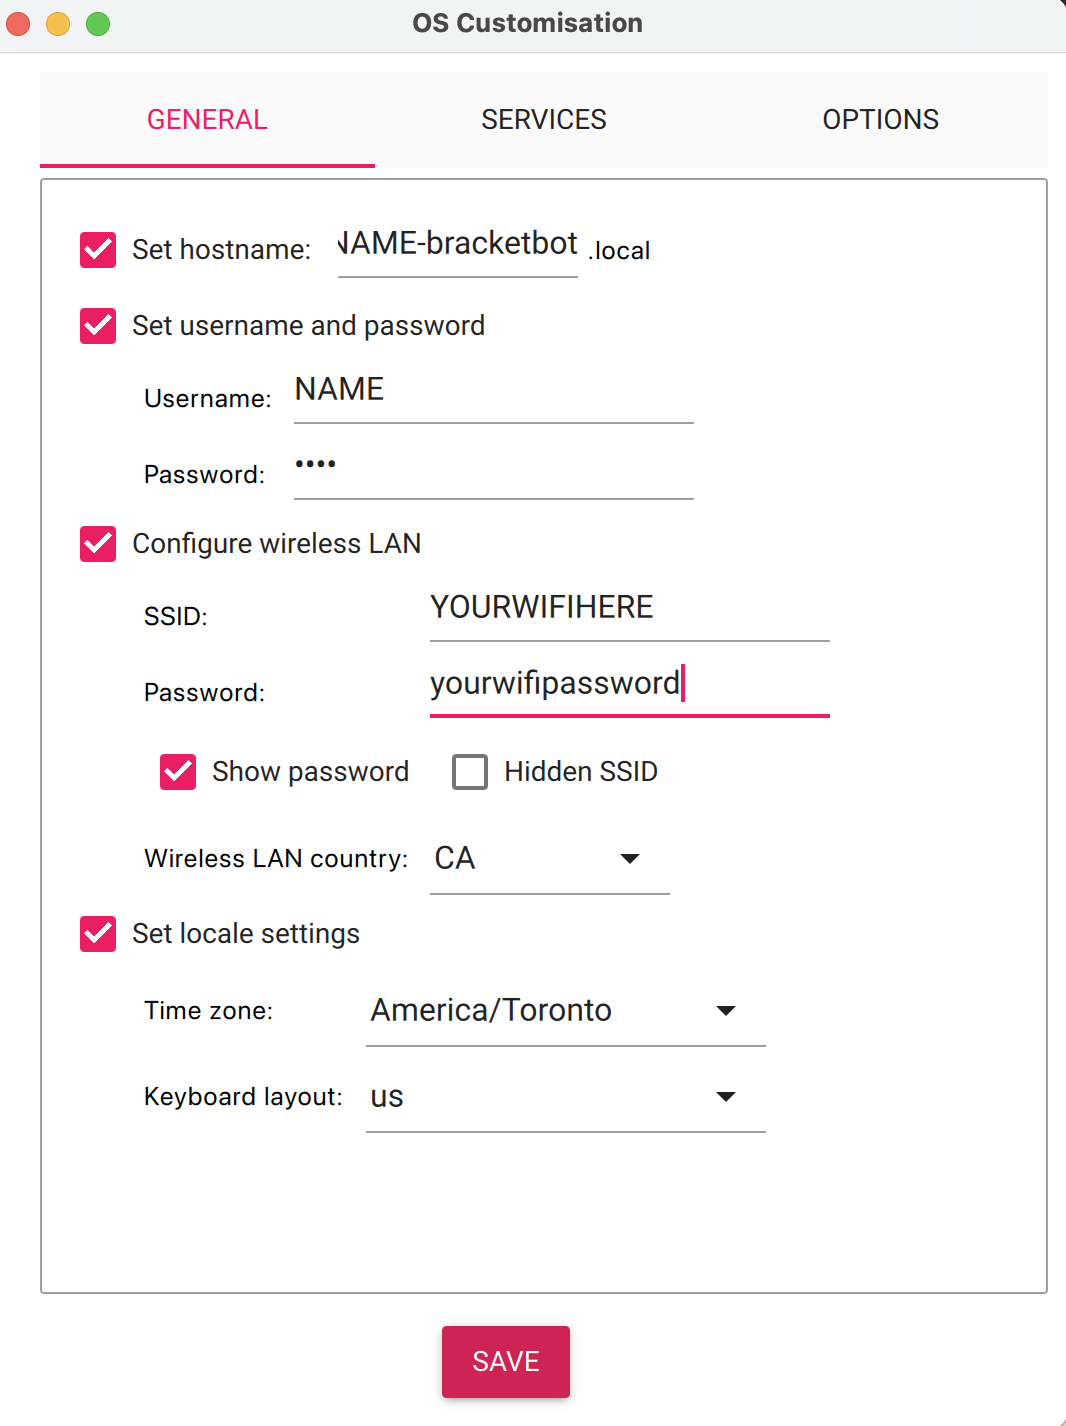
Configure all of the settings
-
Hostname should be your Bracket Bot color followed by "-bracketbot", this is how it will show up on your network, making it easily identifiable.

-
Username should be your Bracket Bot color. Password should be "1234" so its easy to remember.

-
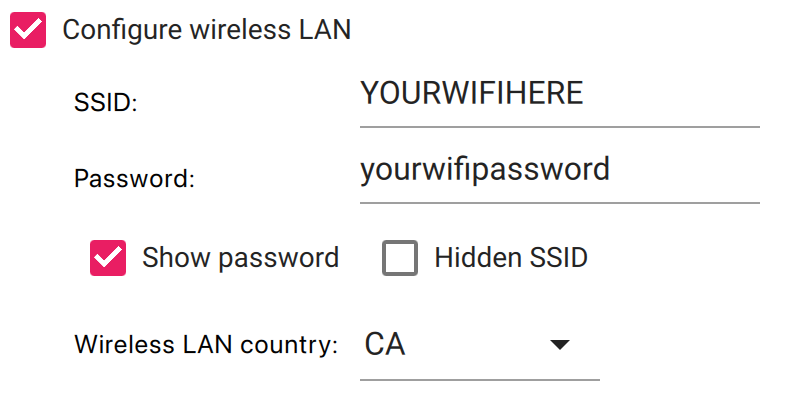
SSID is the name of your wifi at home (or where ever you are setting this up). Password is the password for your wifi. Don't tick the "Hidden SSID" unless you know you need that.
-
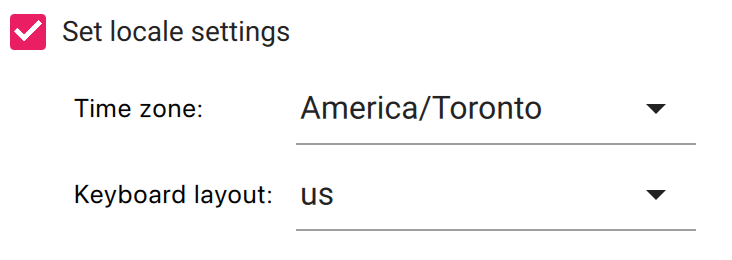
Locale Settings is just for timezone, set it to where you are.
-
You should have something that looks like this.
-
-
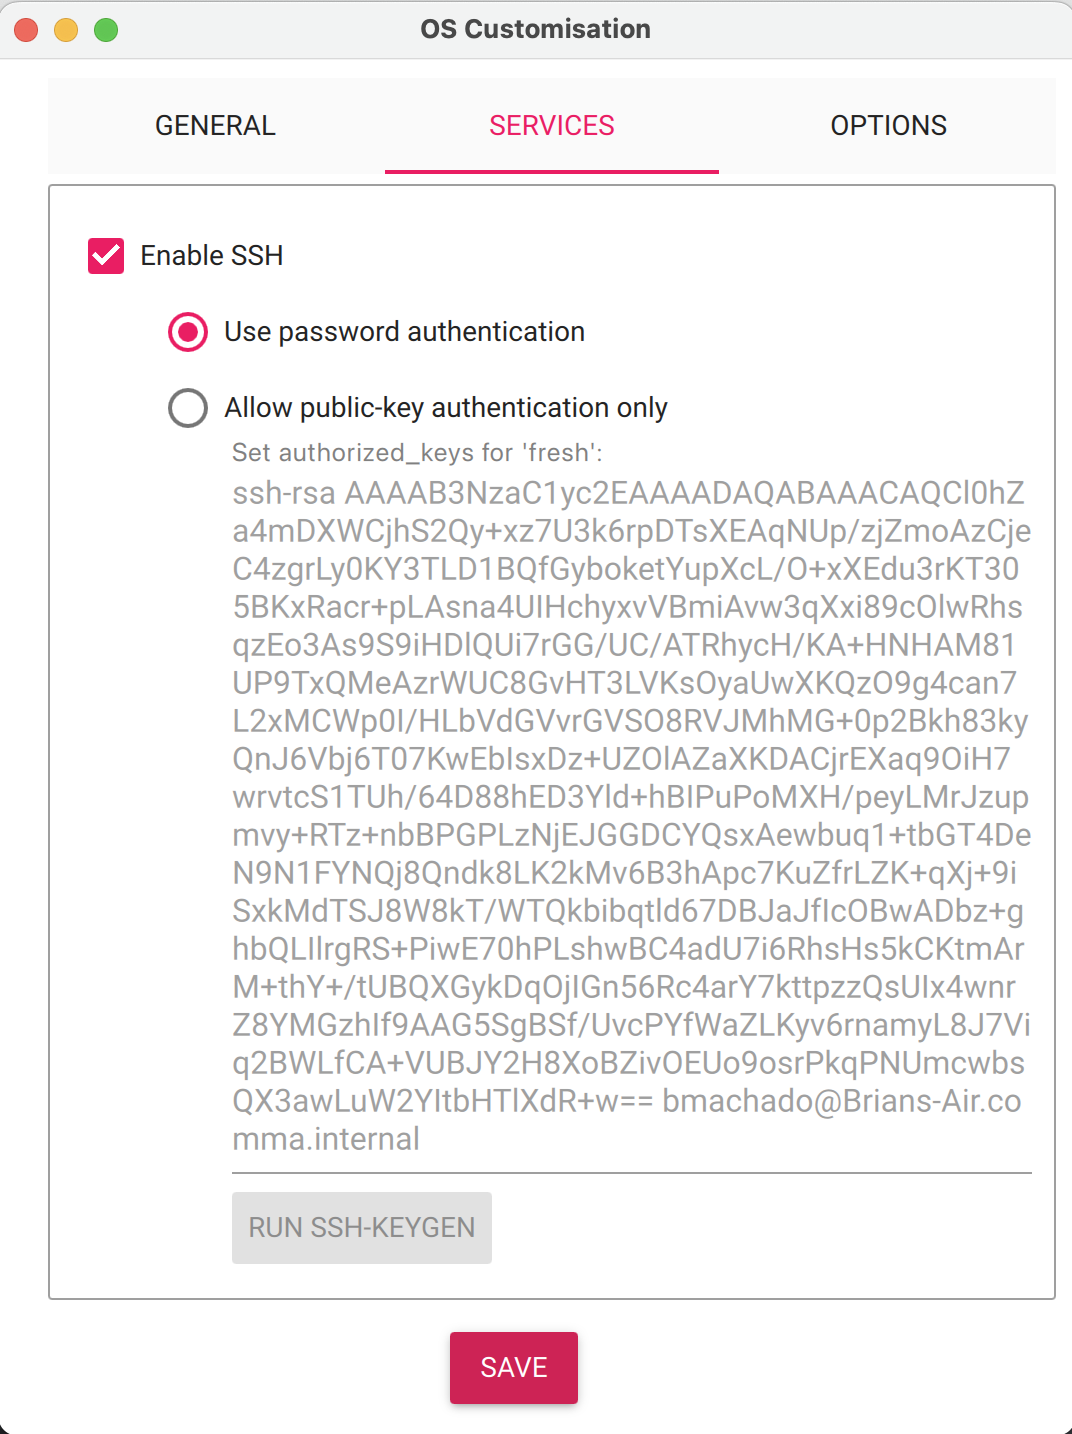
Go to the "SERVICES" tab and check "Enable SSH". Then hit "SAVE".
-
Now press "YES" to start the flashing process.
-
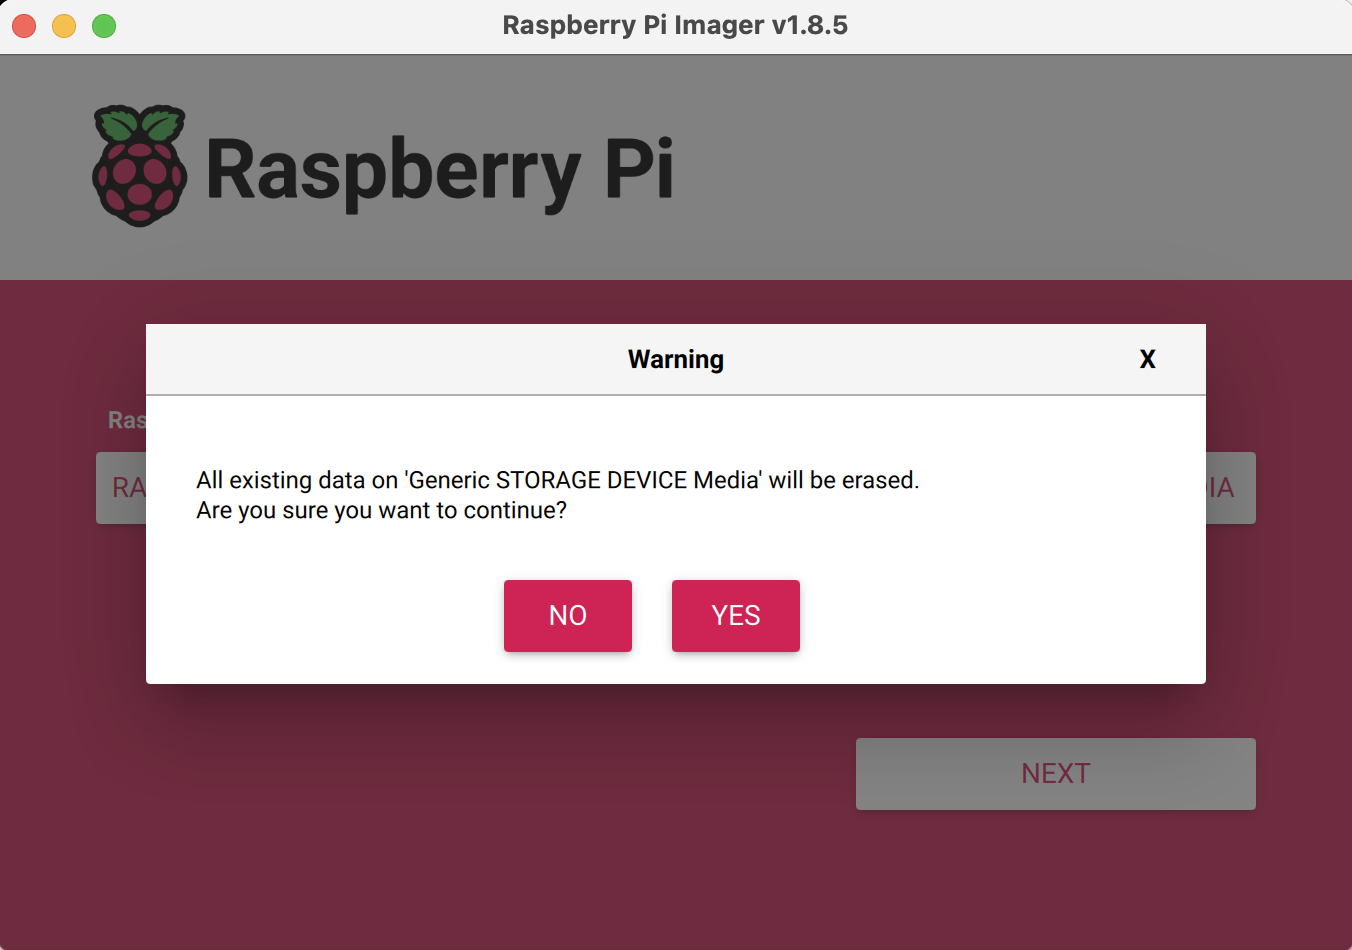
Press "YES" again, this is just telling you that everyone on the SD card will be erased.
-
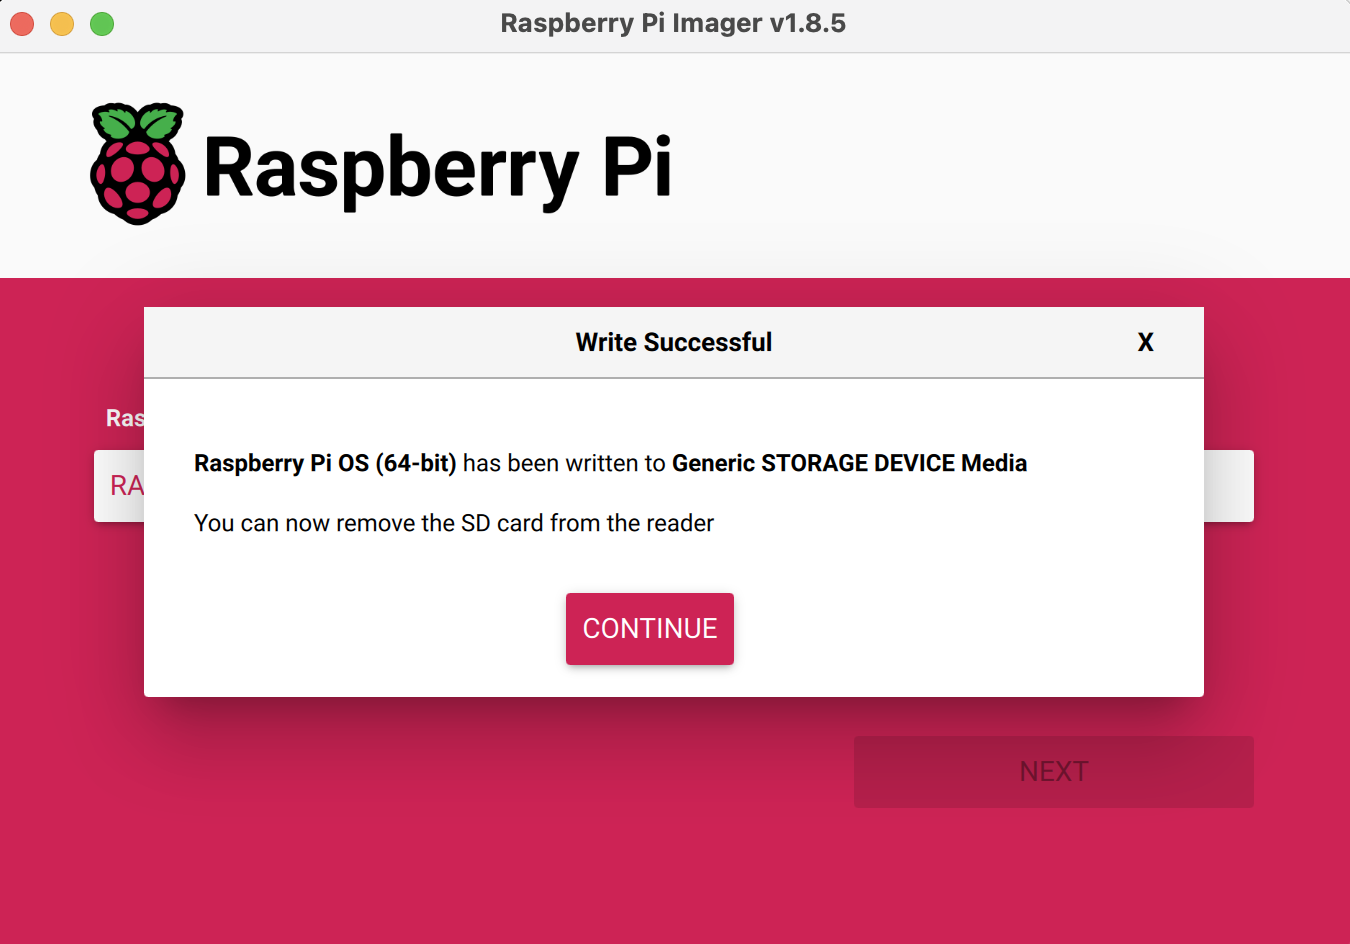
If everything went correctly, you should get this message after a few minutes. If not, try again, maybe your SD came loose while flashing.
-
Insert the SD card into the Raspberry Pi 5.

Updated 2 months ago